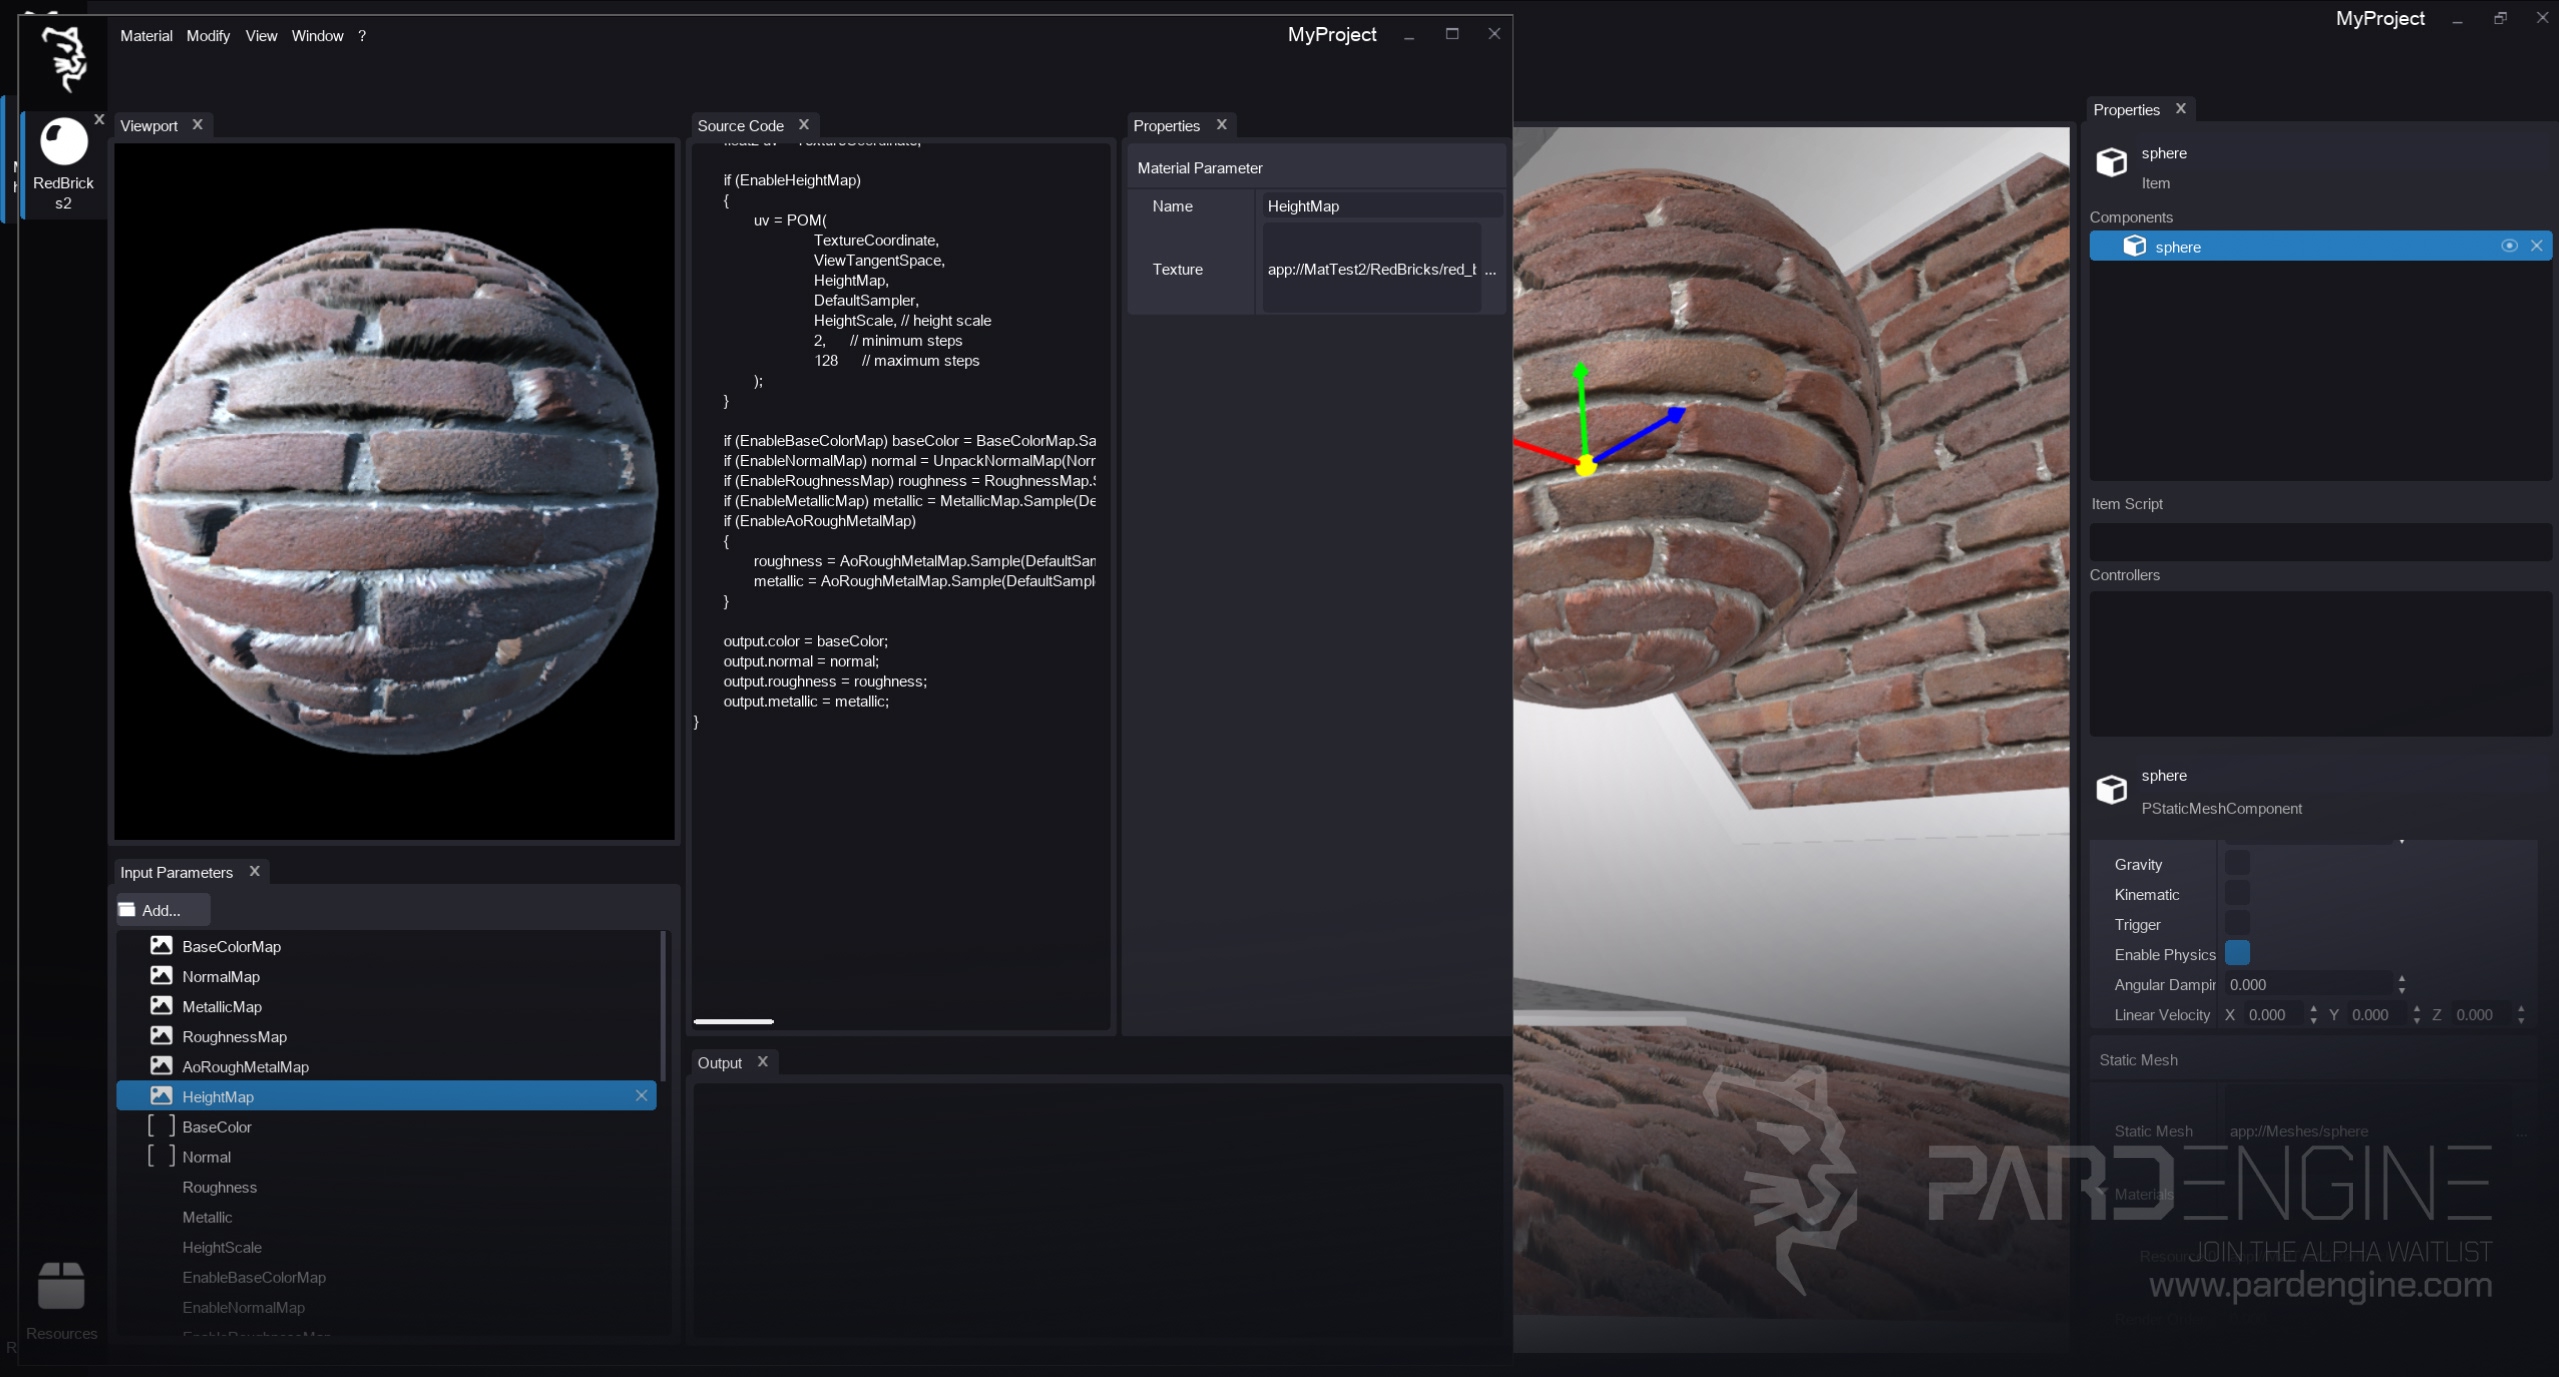
Hello everyone!
Today, we’re finally diving deep into one of the most essential tools for artists and technical designers: the Material Editor.
In this devlog, we’ll walk through the complete material workflow: creating a material from scratch, writing and customizing HLSL shaders, leveraging dynamic parameters, and watching our changes apply in real-time. We’ll also tour the Pard Engine's Material Showroom to see advanced rendering techniques in action. Let’s get started!
Creating a Material
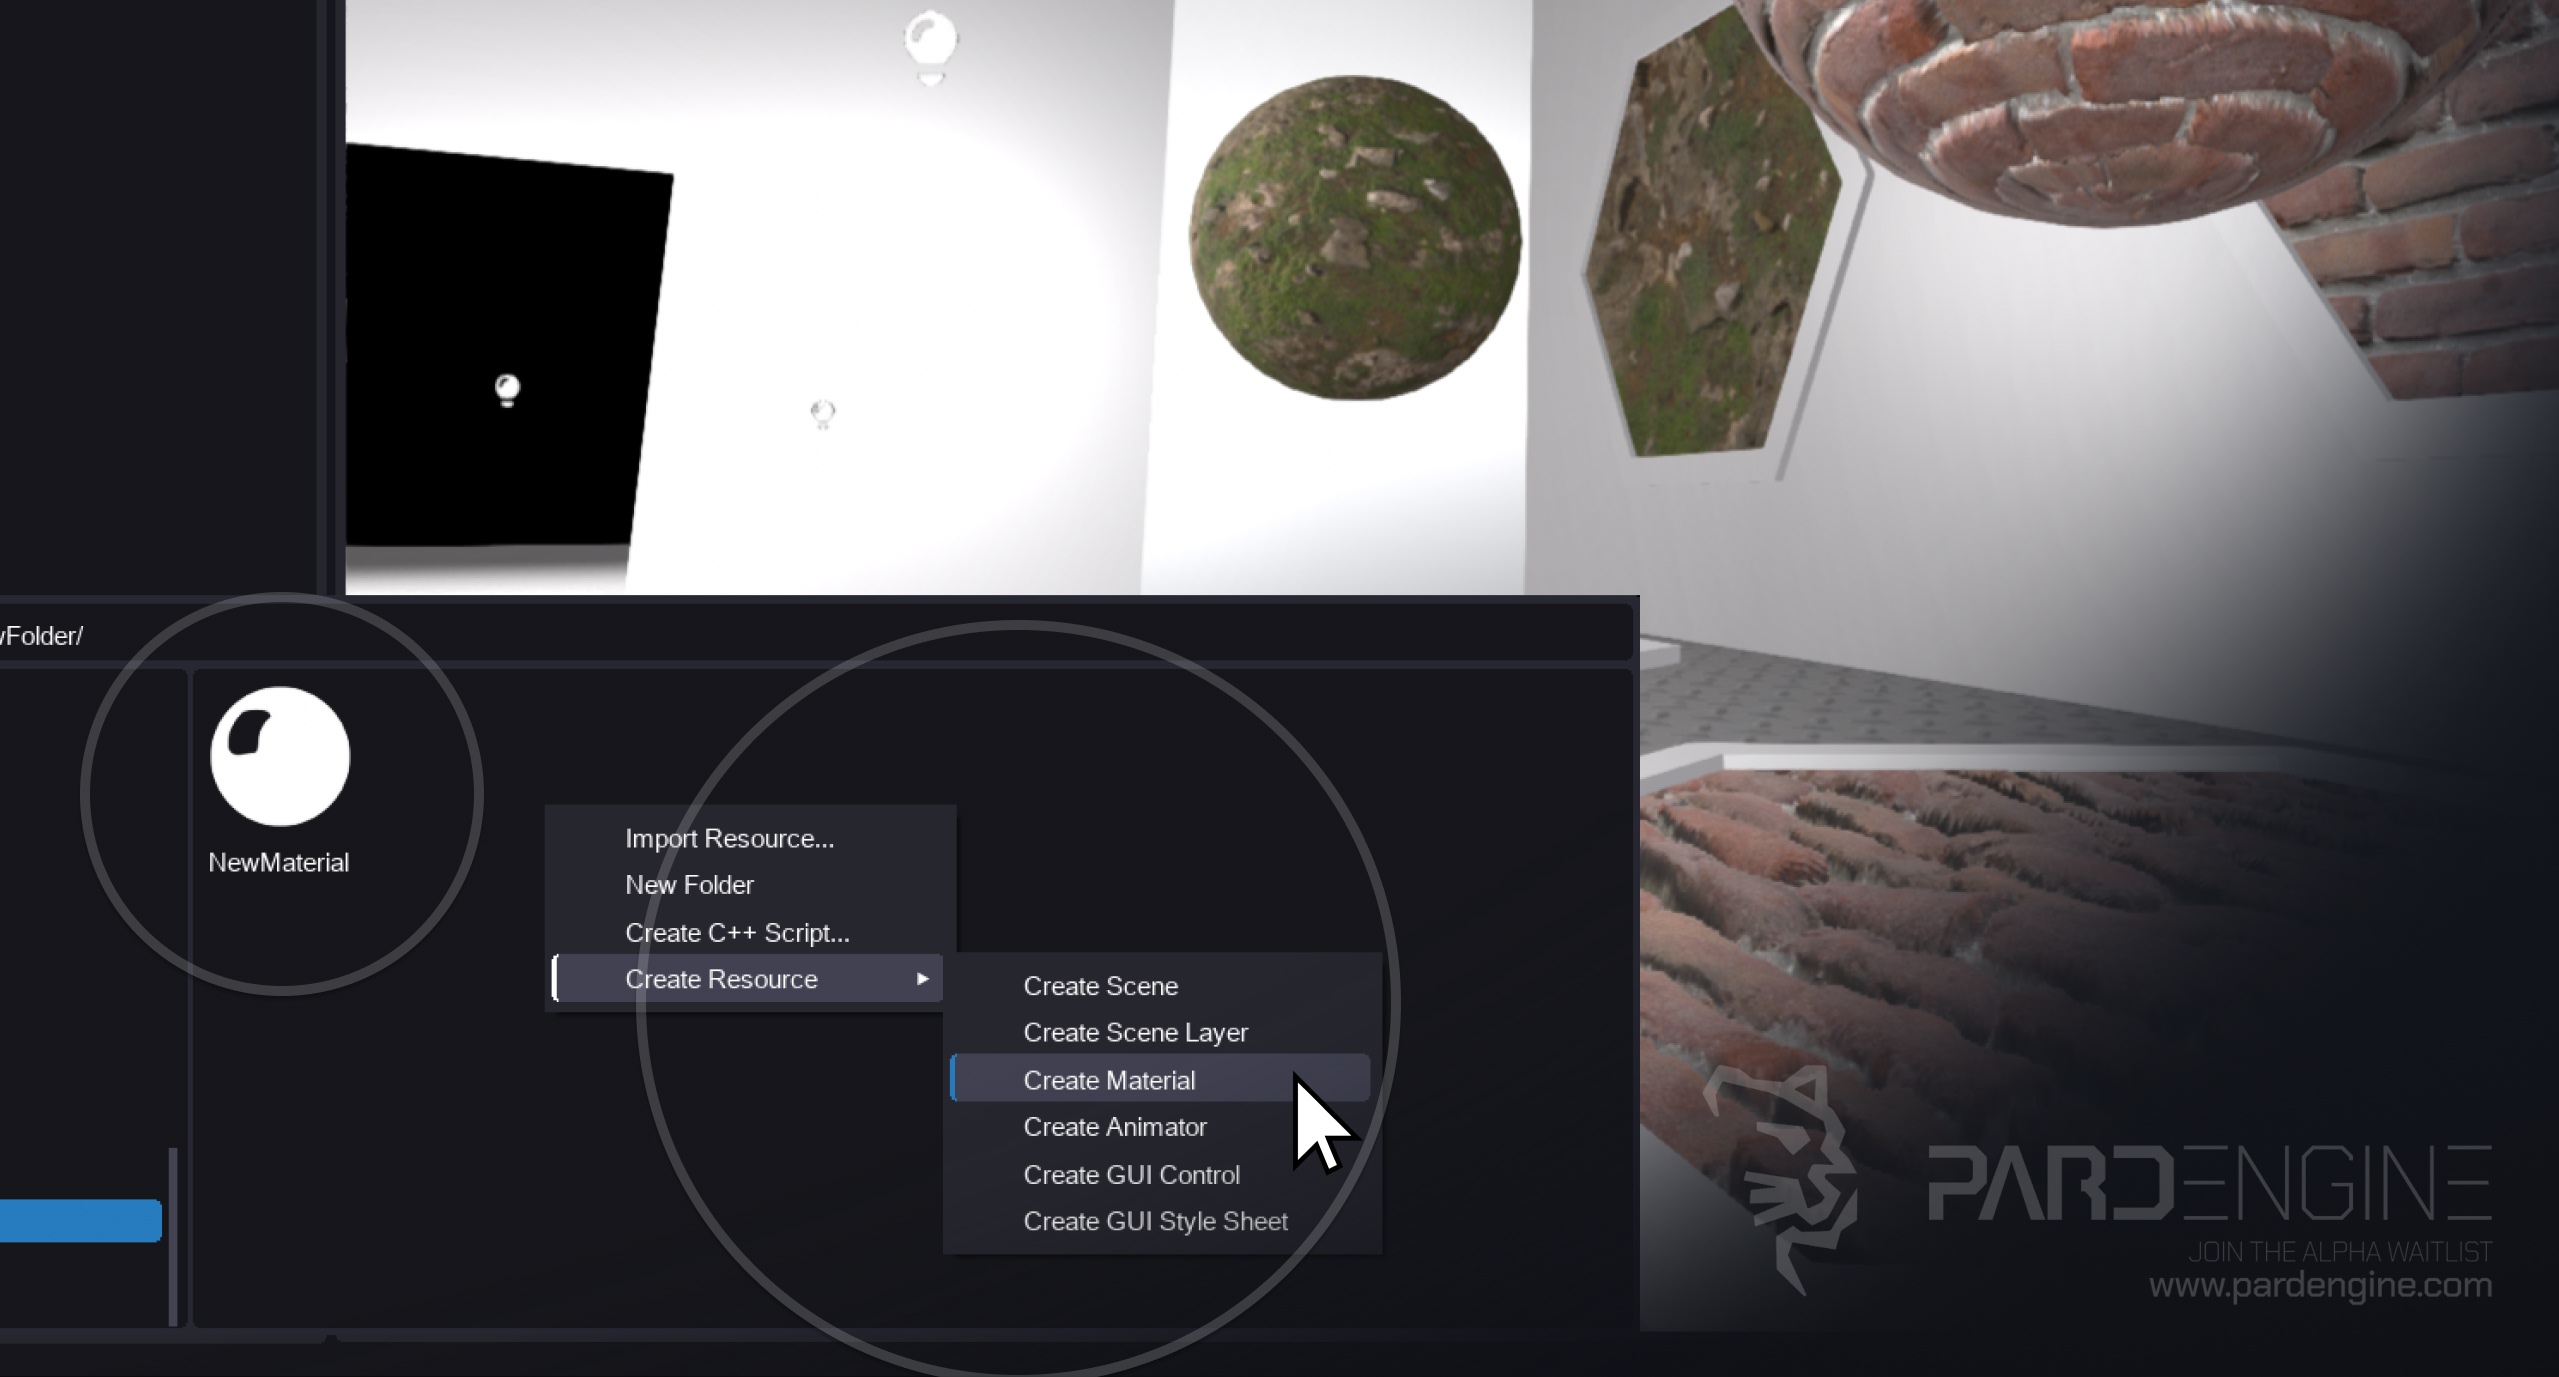
Figure 1: Creating a Material. The Resource Browser shows the selected folder, with the newly created Material resource visible inside.
Creating a material in Pard Engine is straightforward:
Open the Resource Browser.
Navigate to your desired folder.
Right-click → Create Resource → Create Material.
A default asset named NewMaterial appears, ready for customization.
Inside the Material Editor
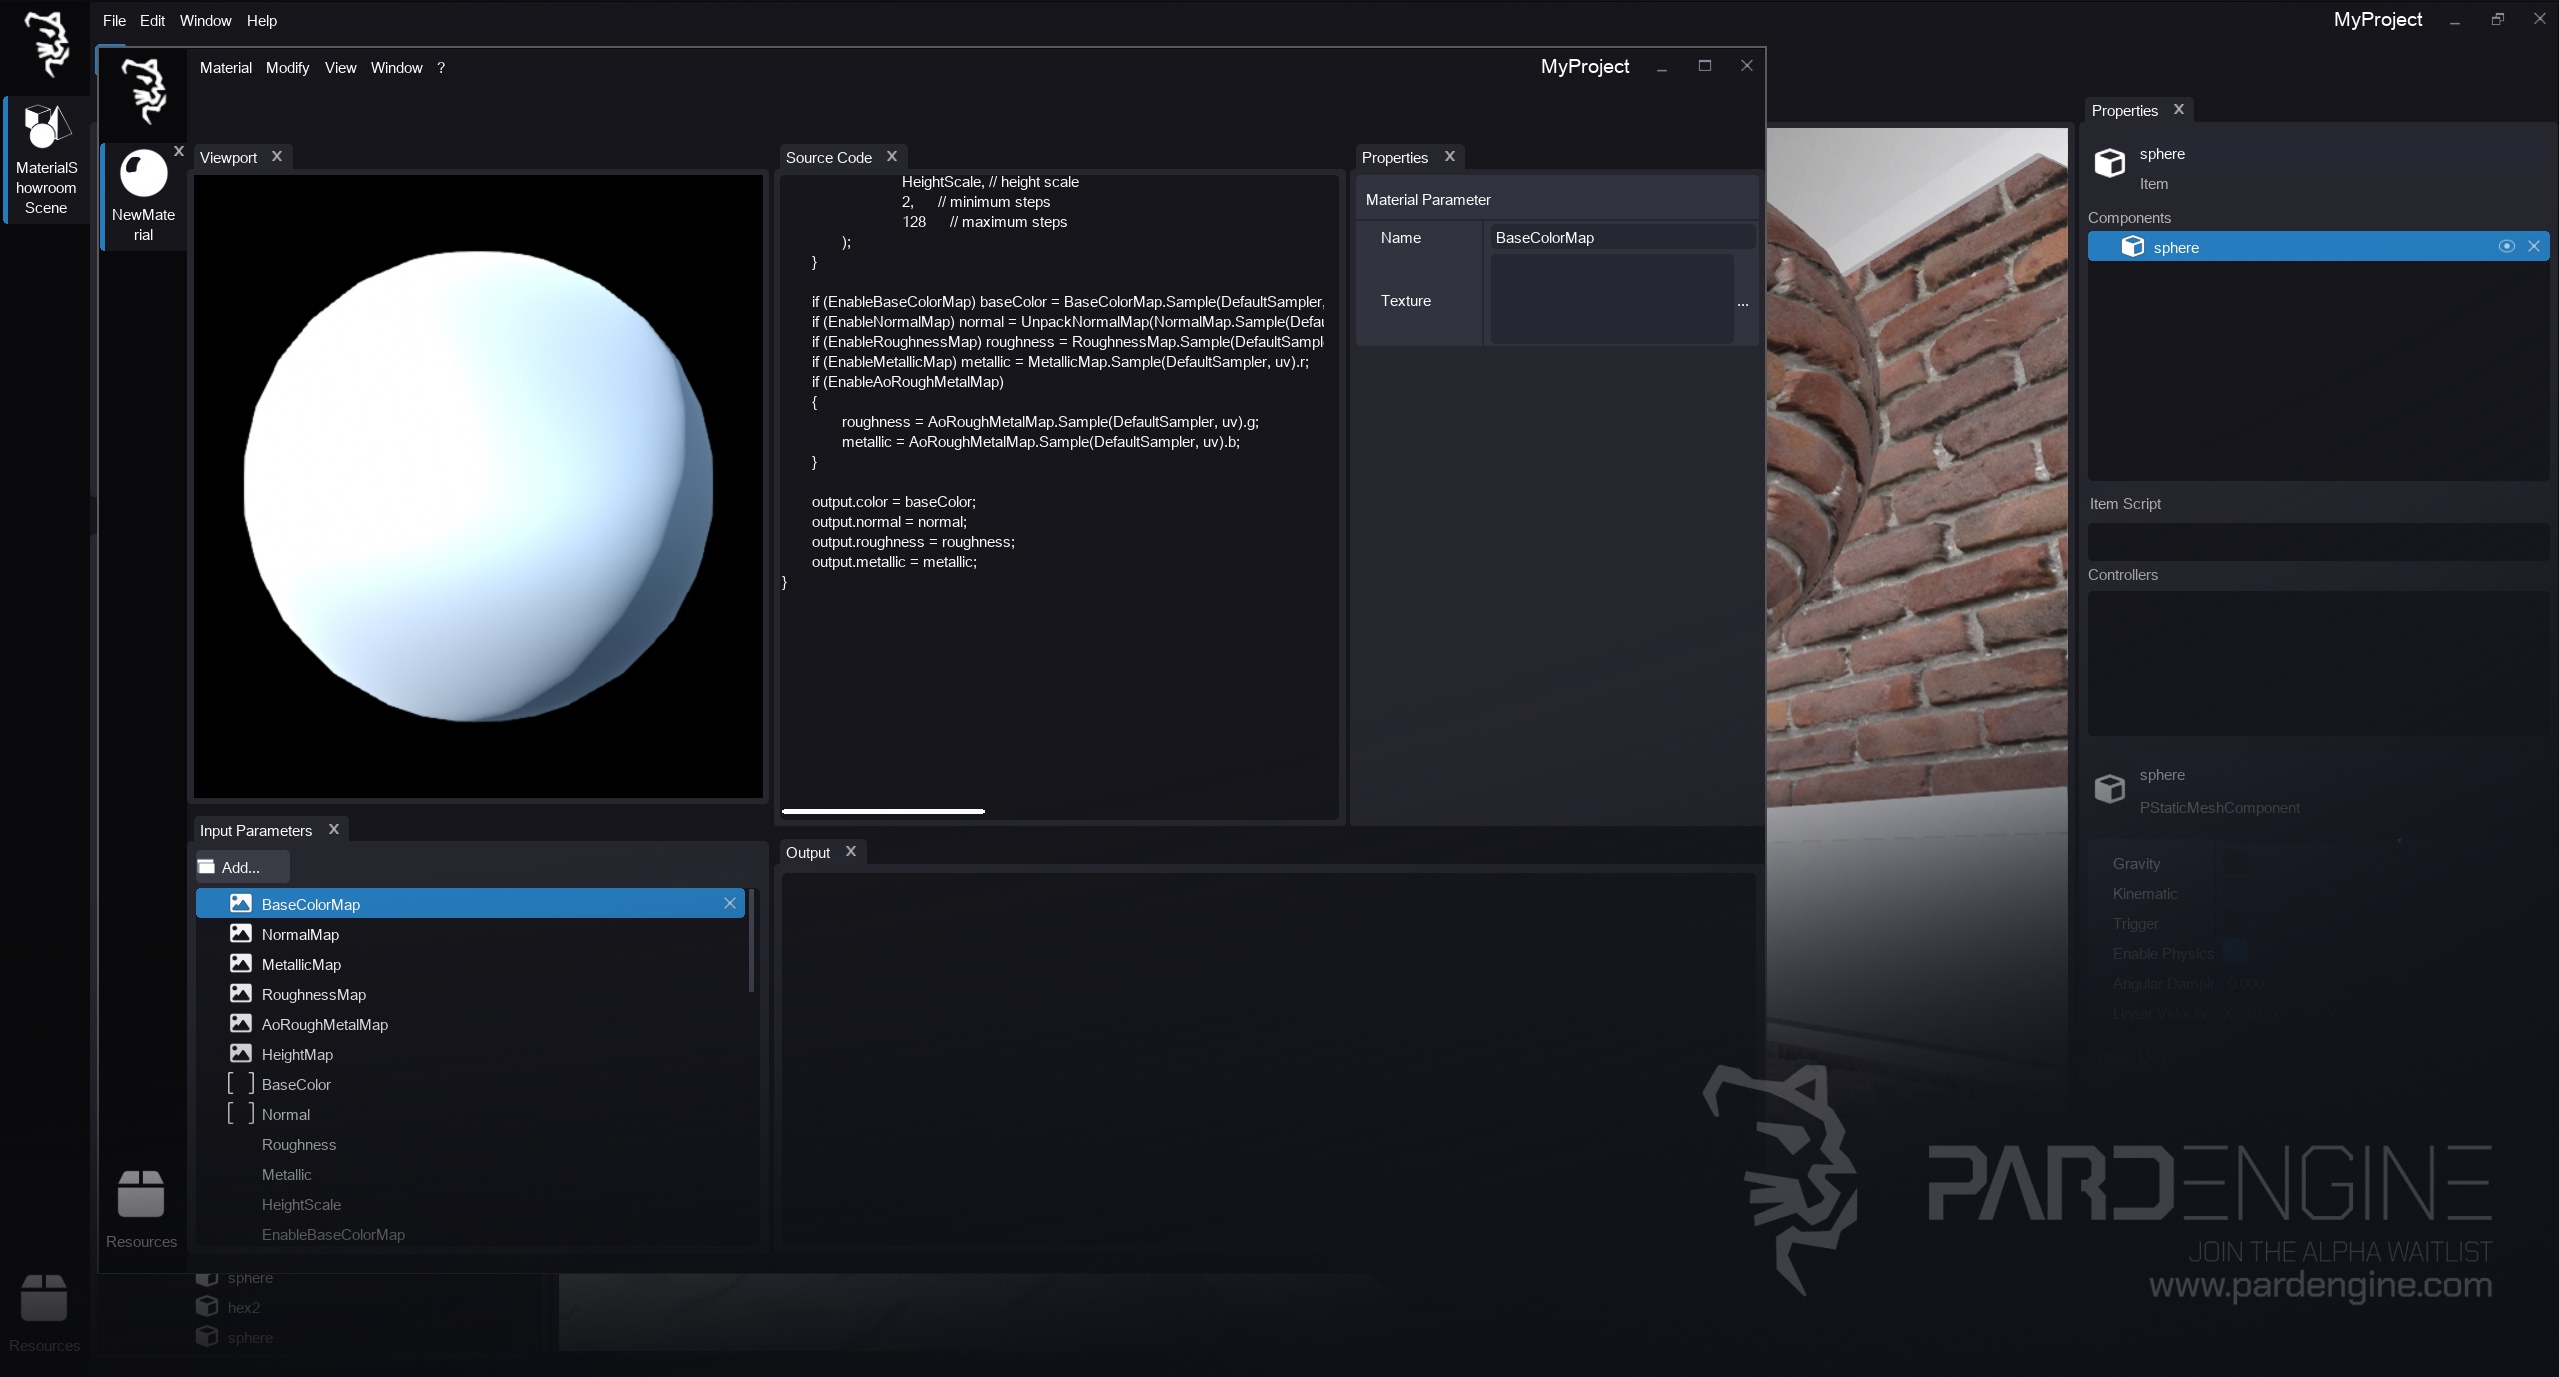
Figure 2: Material Editor. The Material Editor is the interface used to modify a material resource's components. This view shows an open Default Material, displaying its default input parameters and shader code template.
Double-click the material to open the Material Editor. Like all Pard Engine Studio tools, it lives in a docking-capable workspace window. When we launch the Material Editor, the engine automatically creates a new workspace window containing the editor, which, in turn, is composed by:
Viewport Panel (top-left): Renders a default sphere with your material applied for instant visual feedback.
Input Parameters Panel (bottom-left): Add, edit, or remove inputs like textures, vectors, booleans, and scalars.
HLSL Source Editor Panel (center): Write and modify the shader code directly.
Output Panel (bottom): Displays compile messages, warnings, and errors at compile-time.
Properties Panel (right): Context-sensitive settings for the selected input parameter.
By default, Pard Engine ships a ready-to-use shader template with common inputs. For most projects, tweaking these parameters is enough. For full control, we can strip the default code and build from the ground up.
Let's try to recreate a material from scratch.
The resulting shader code after the strip should look like this:
void VSMain(inout VSOut output)
{
}
void PSMain(inout PSOut output)
{
}
Remove also the various input parameters in the Input Parameters Panel by clicking on the X button on the right of each list item.
Material Input Parameters
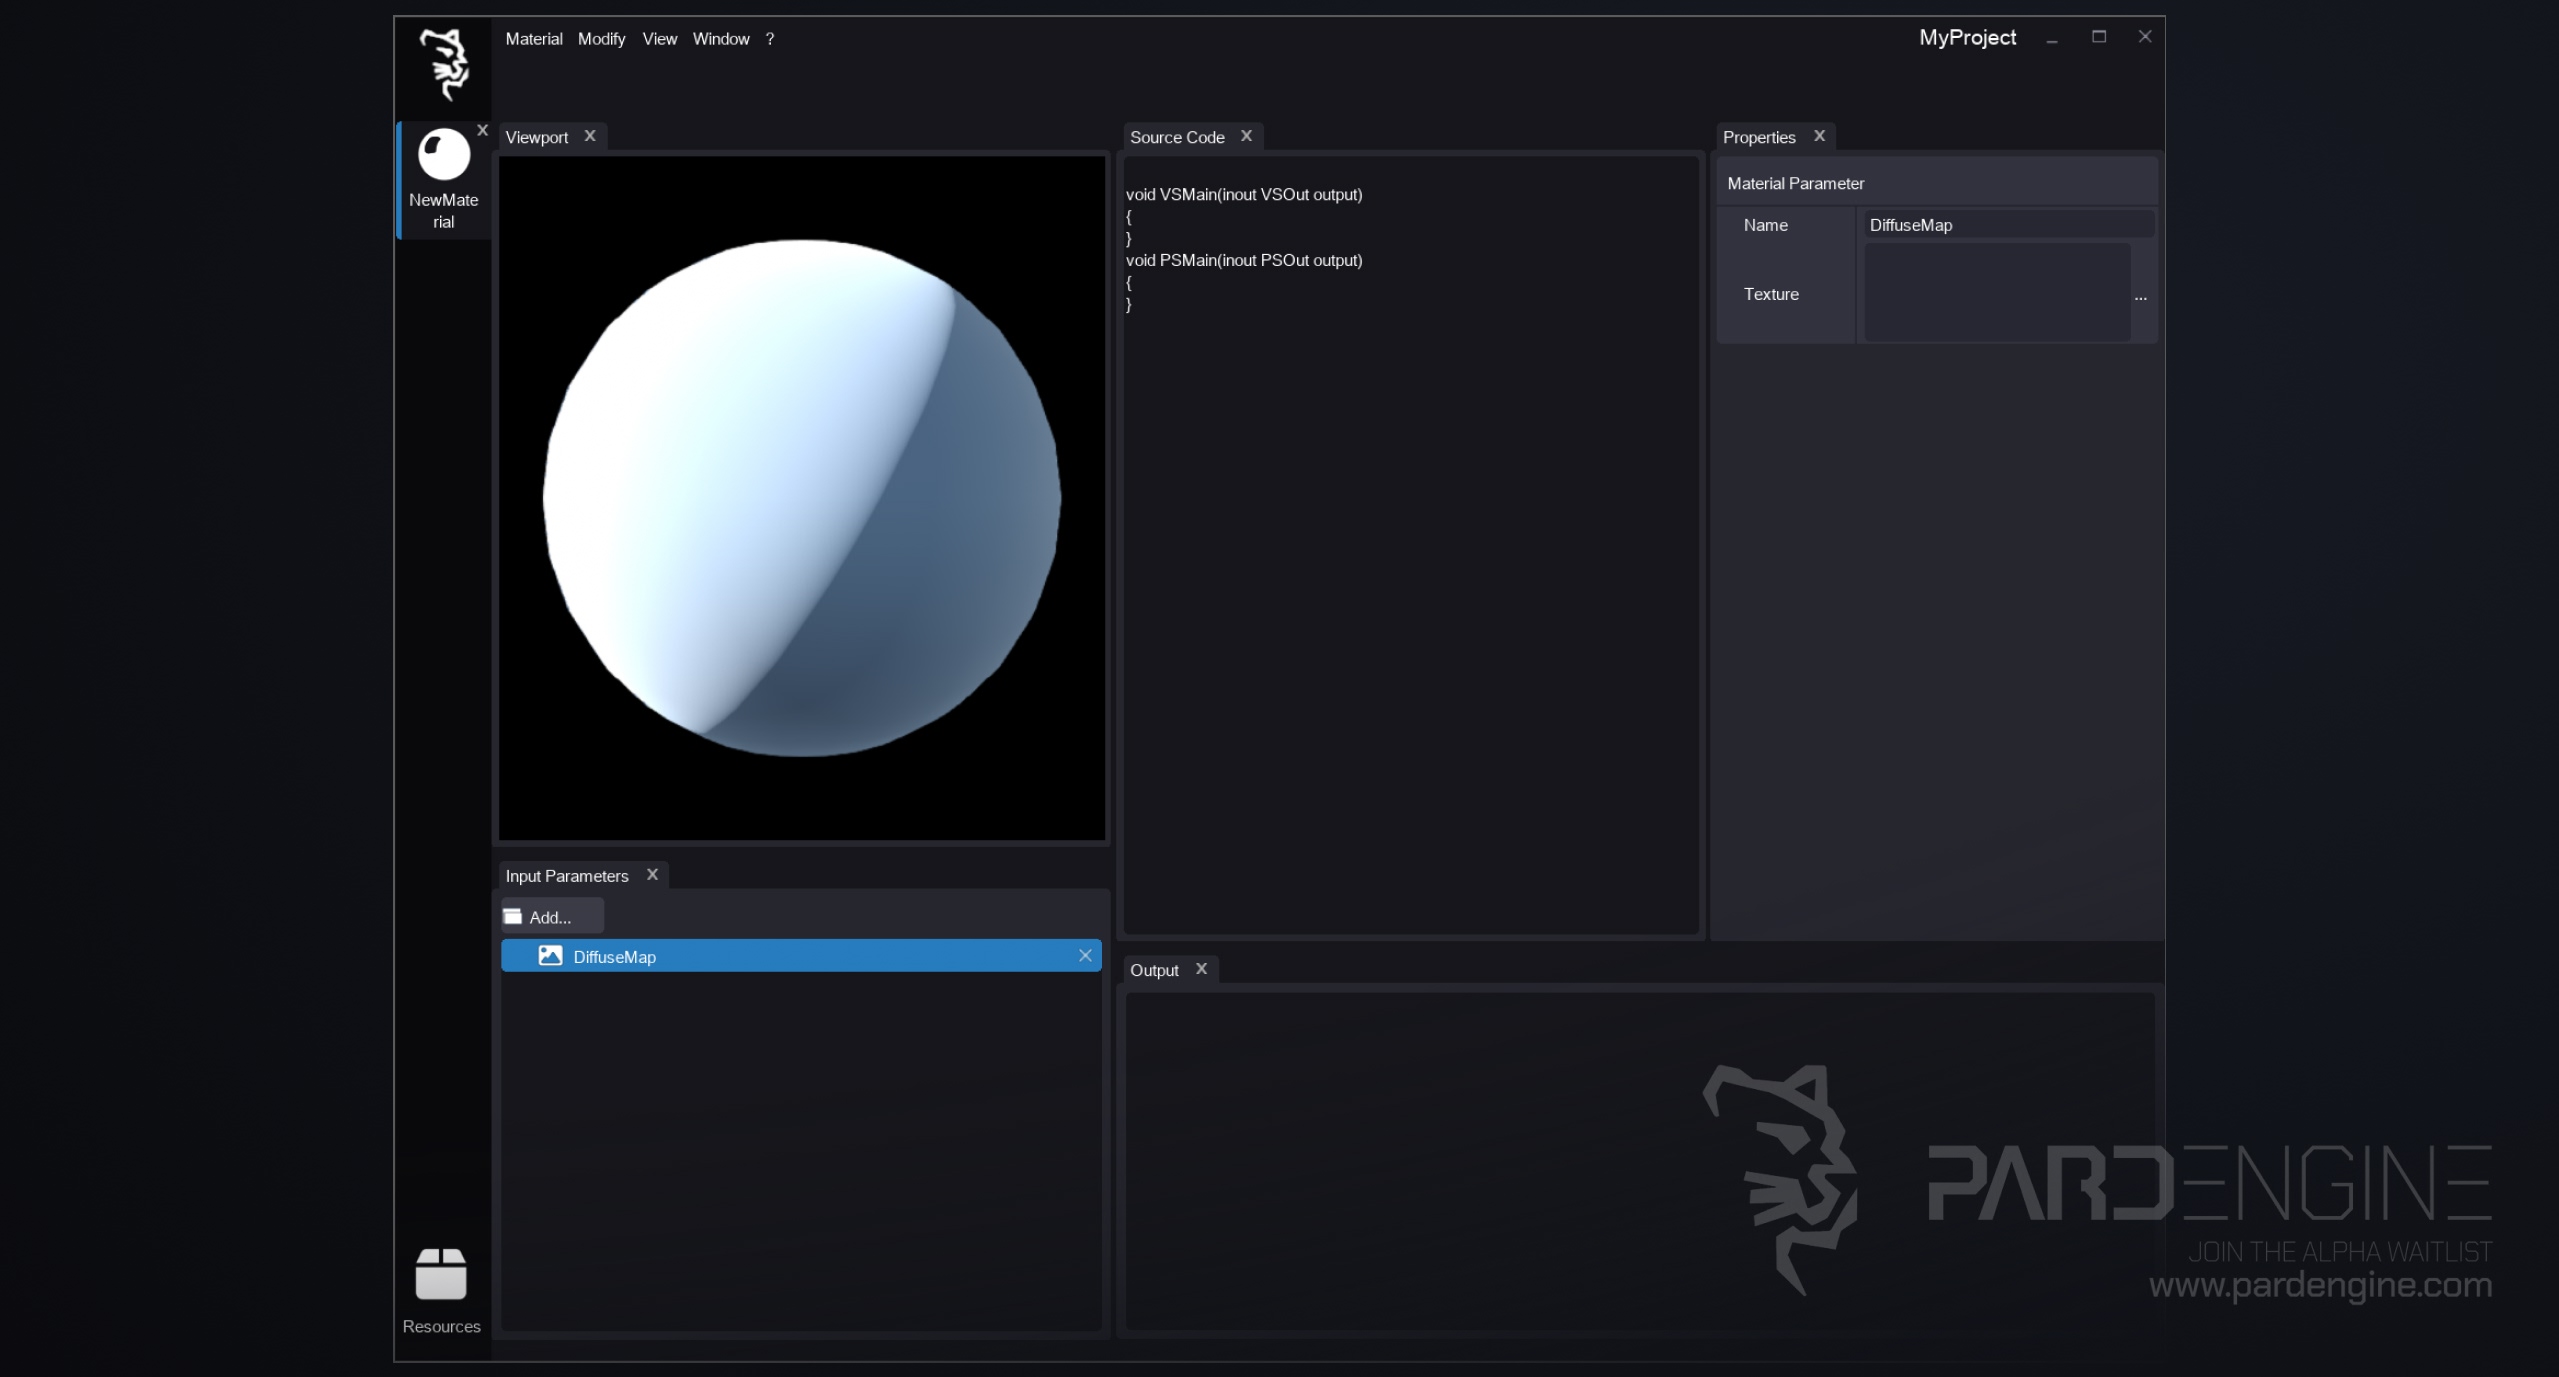
Figure 3: Adding the DiffuseMap Parameter. This view shows the DiffuseMap material input added to the Input Parameters list, with the original shader code cleared.
Parameters are external data inputs that drive your shader’s behavior. They can be modified in the editor or at runtime, enabling dynamic effects. For example, a color parameter could shift from red to green when a player steps on a specific surface.
Let's start by editing our first material by adding a single texture parameter. Click on the Add button at the top of the Input Parameters Panel and in the context menu select Add texture.
A new parameter with a default name (e.g. NewTexture ) should appear in the list. It is possible to rename it using the Properties panel like in Figure 3 and change it in DiffuseMap.
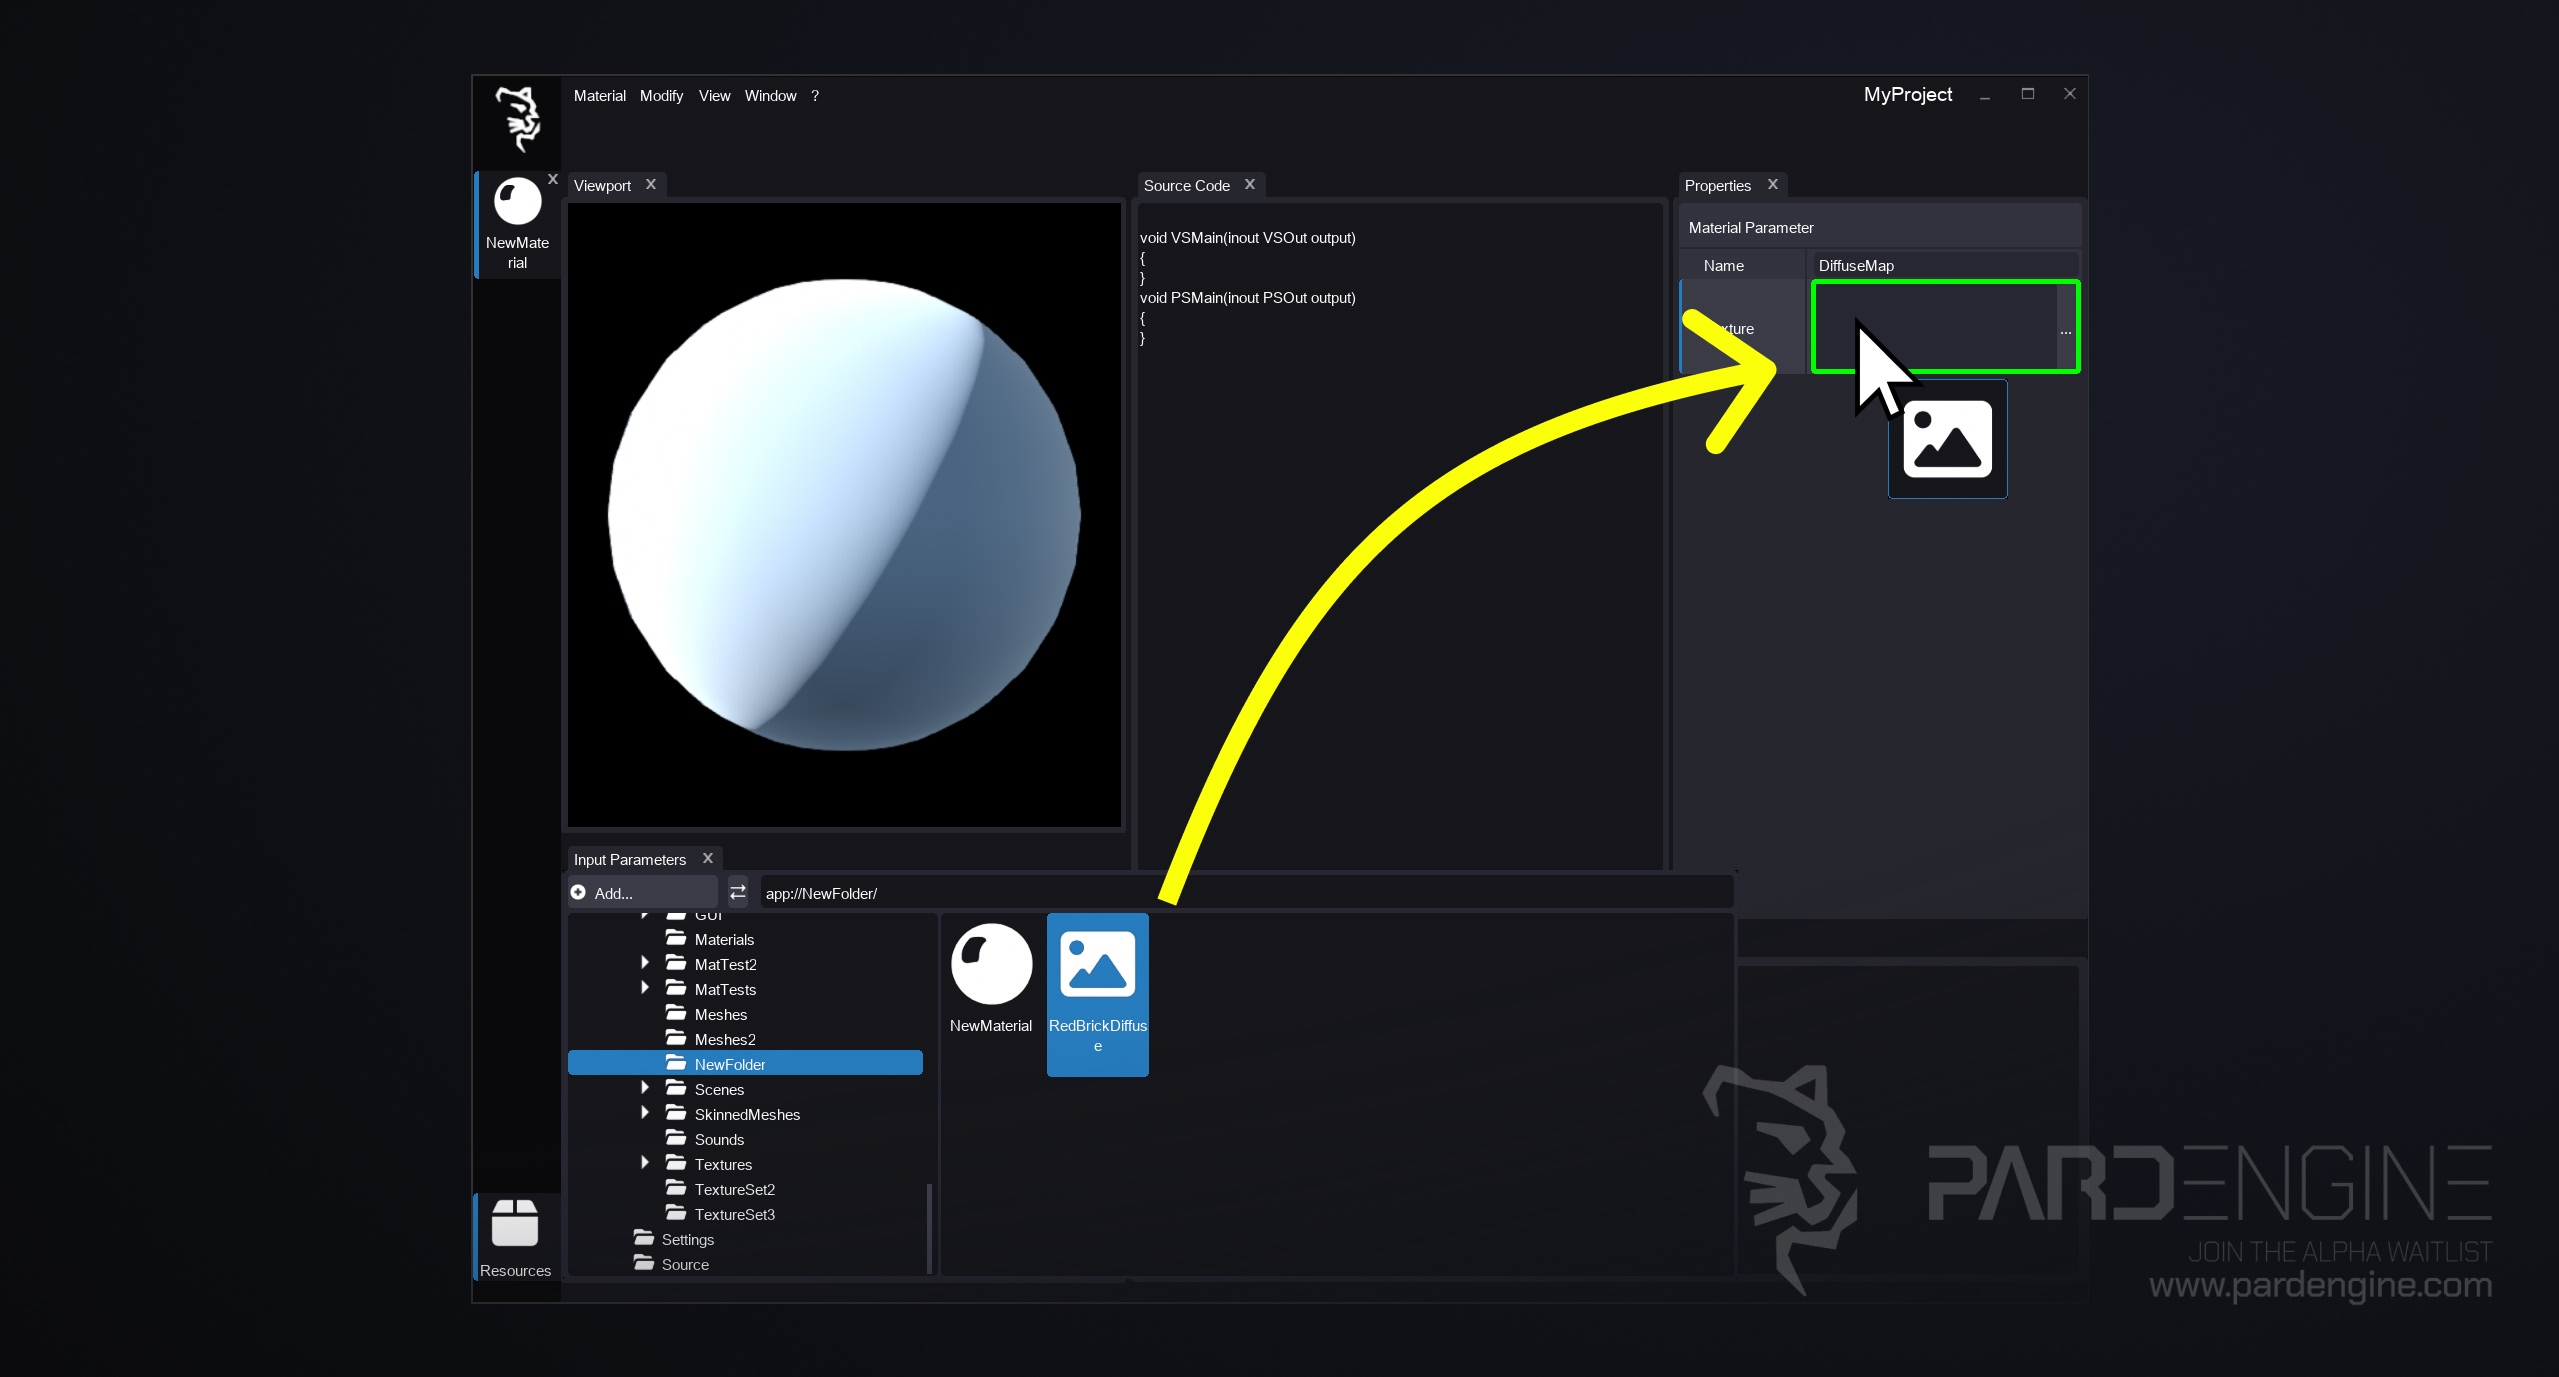
Figure 4: Assigning a Texture to DiffuseMap.
At this point we can import a texture using the Resource Browser (right click on your desired folder, click on Import resource, and select an image (.png, .jpg etc.) to import), drag & drop it to the texture attribute of the input parameter using the Properties Panel.
That's it.
Now, we can write the code to actually display it.
Writing HLSL Code
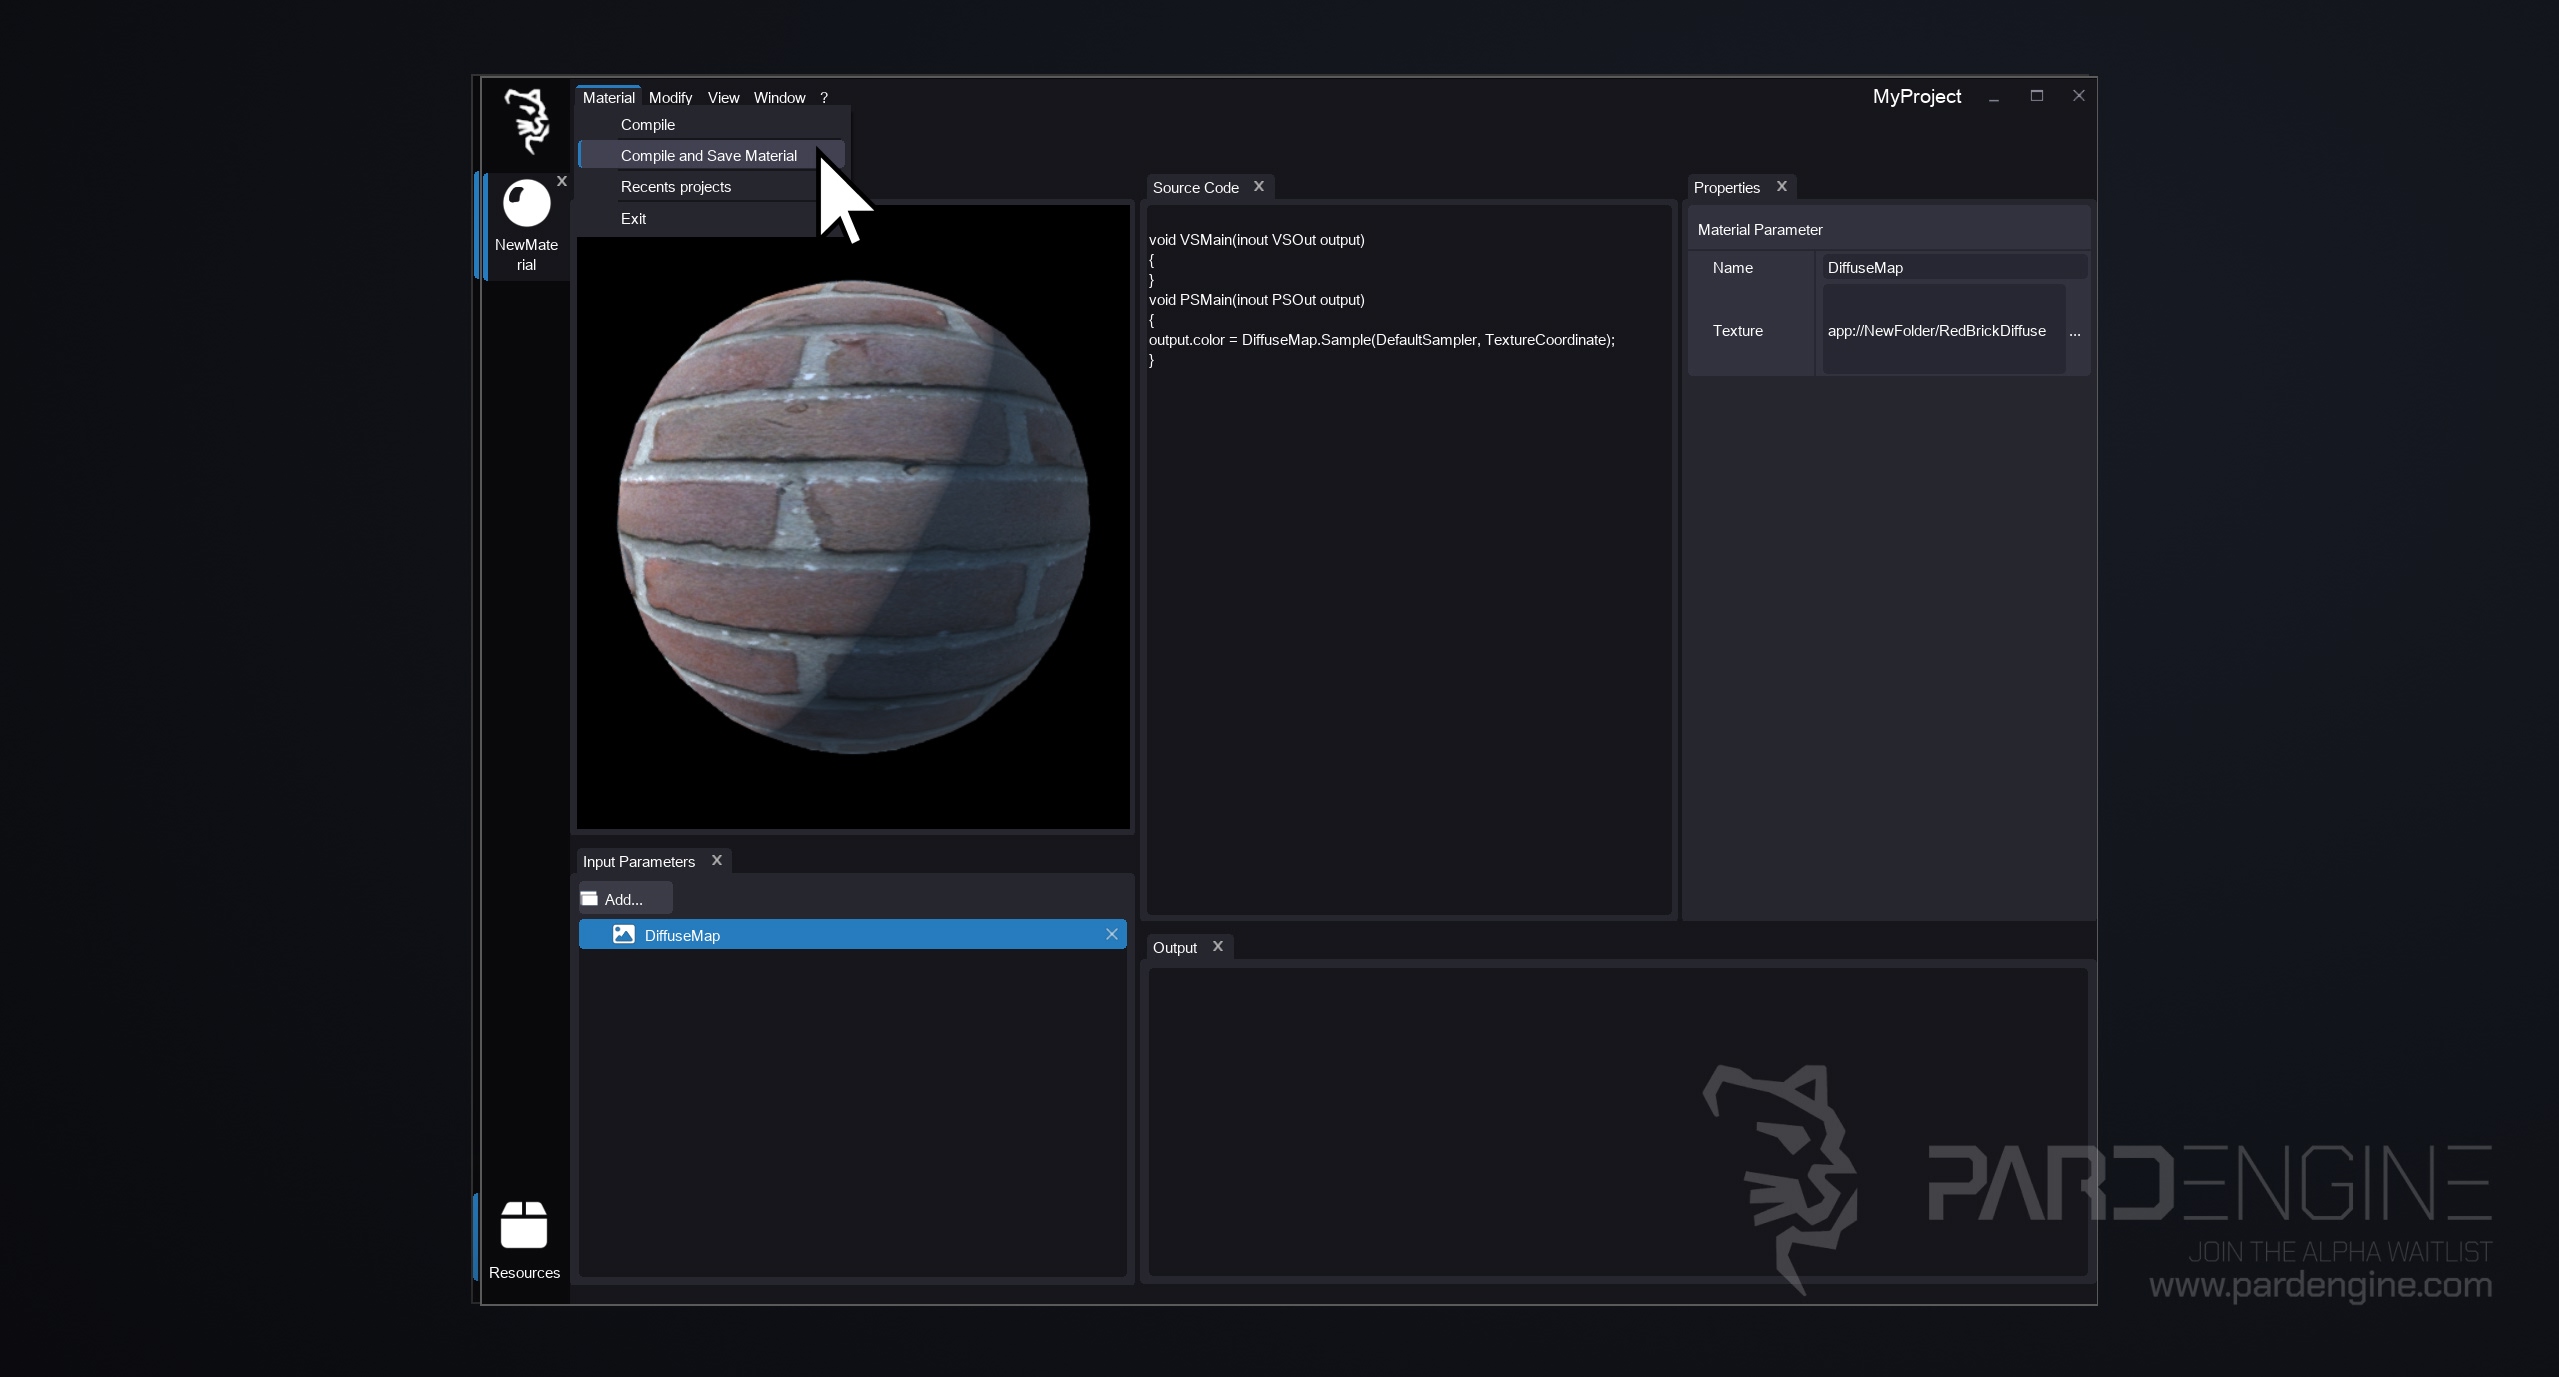
Figure 5: Viewing the Result. After compiling the material, the final preview renders in the Viewport Panel. (Asset credit: Poly Haven)
To render a texture on a 3D mesh, we need to define how the pixel shader processes each pixel. In the entry point function of the pixel shader, called PSMain, a single line is all it takes:
output.diffuse = DiffuseMap.Sample(DefaultSampler, TextureCoordinate);This samples the texture using a default sampler and the mesh’s UV coordinates. For deeper dives into Sample and HLSL sampling, check out Microsoft’s HLSL Documentation.
Once written, we can go to Material → Compile & Save. Our texture will immediately appear on the preview sphere, like in Figure 5.
Assigning Materials & Hot-Reload Workflow
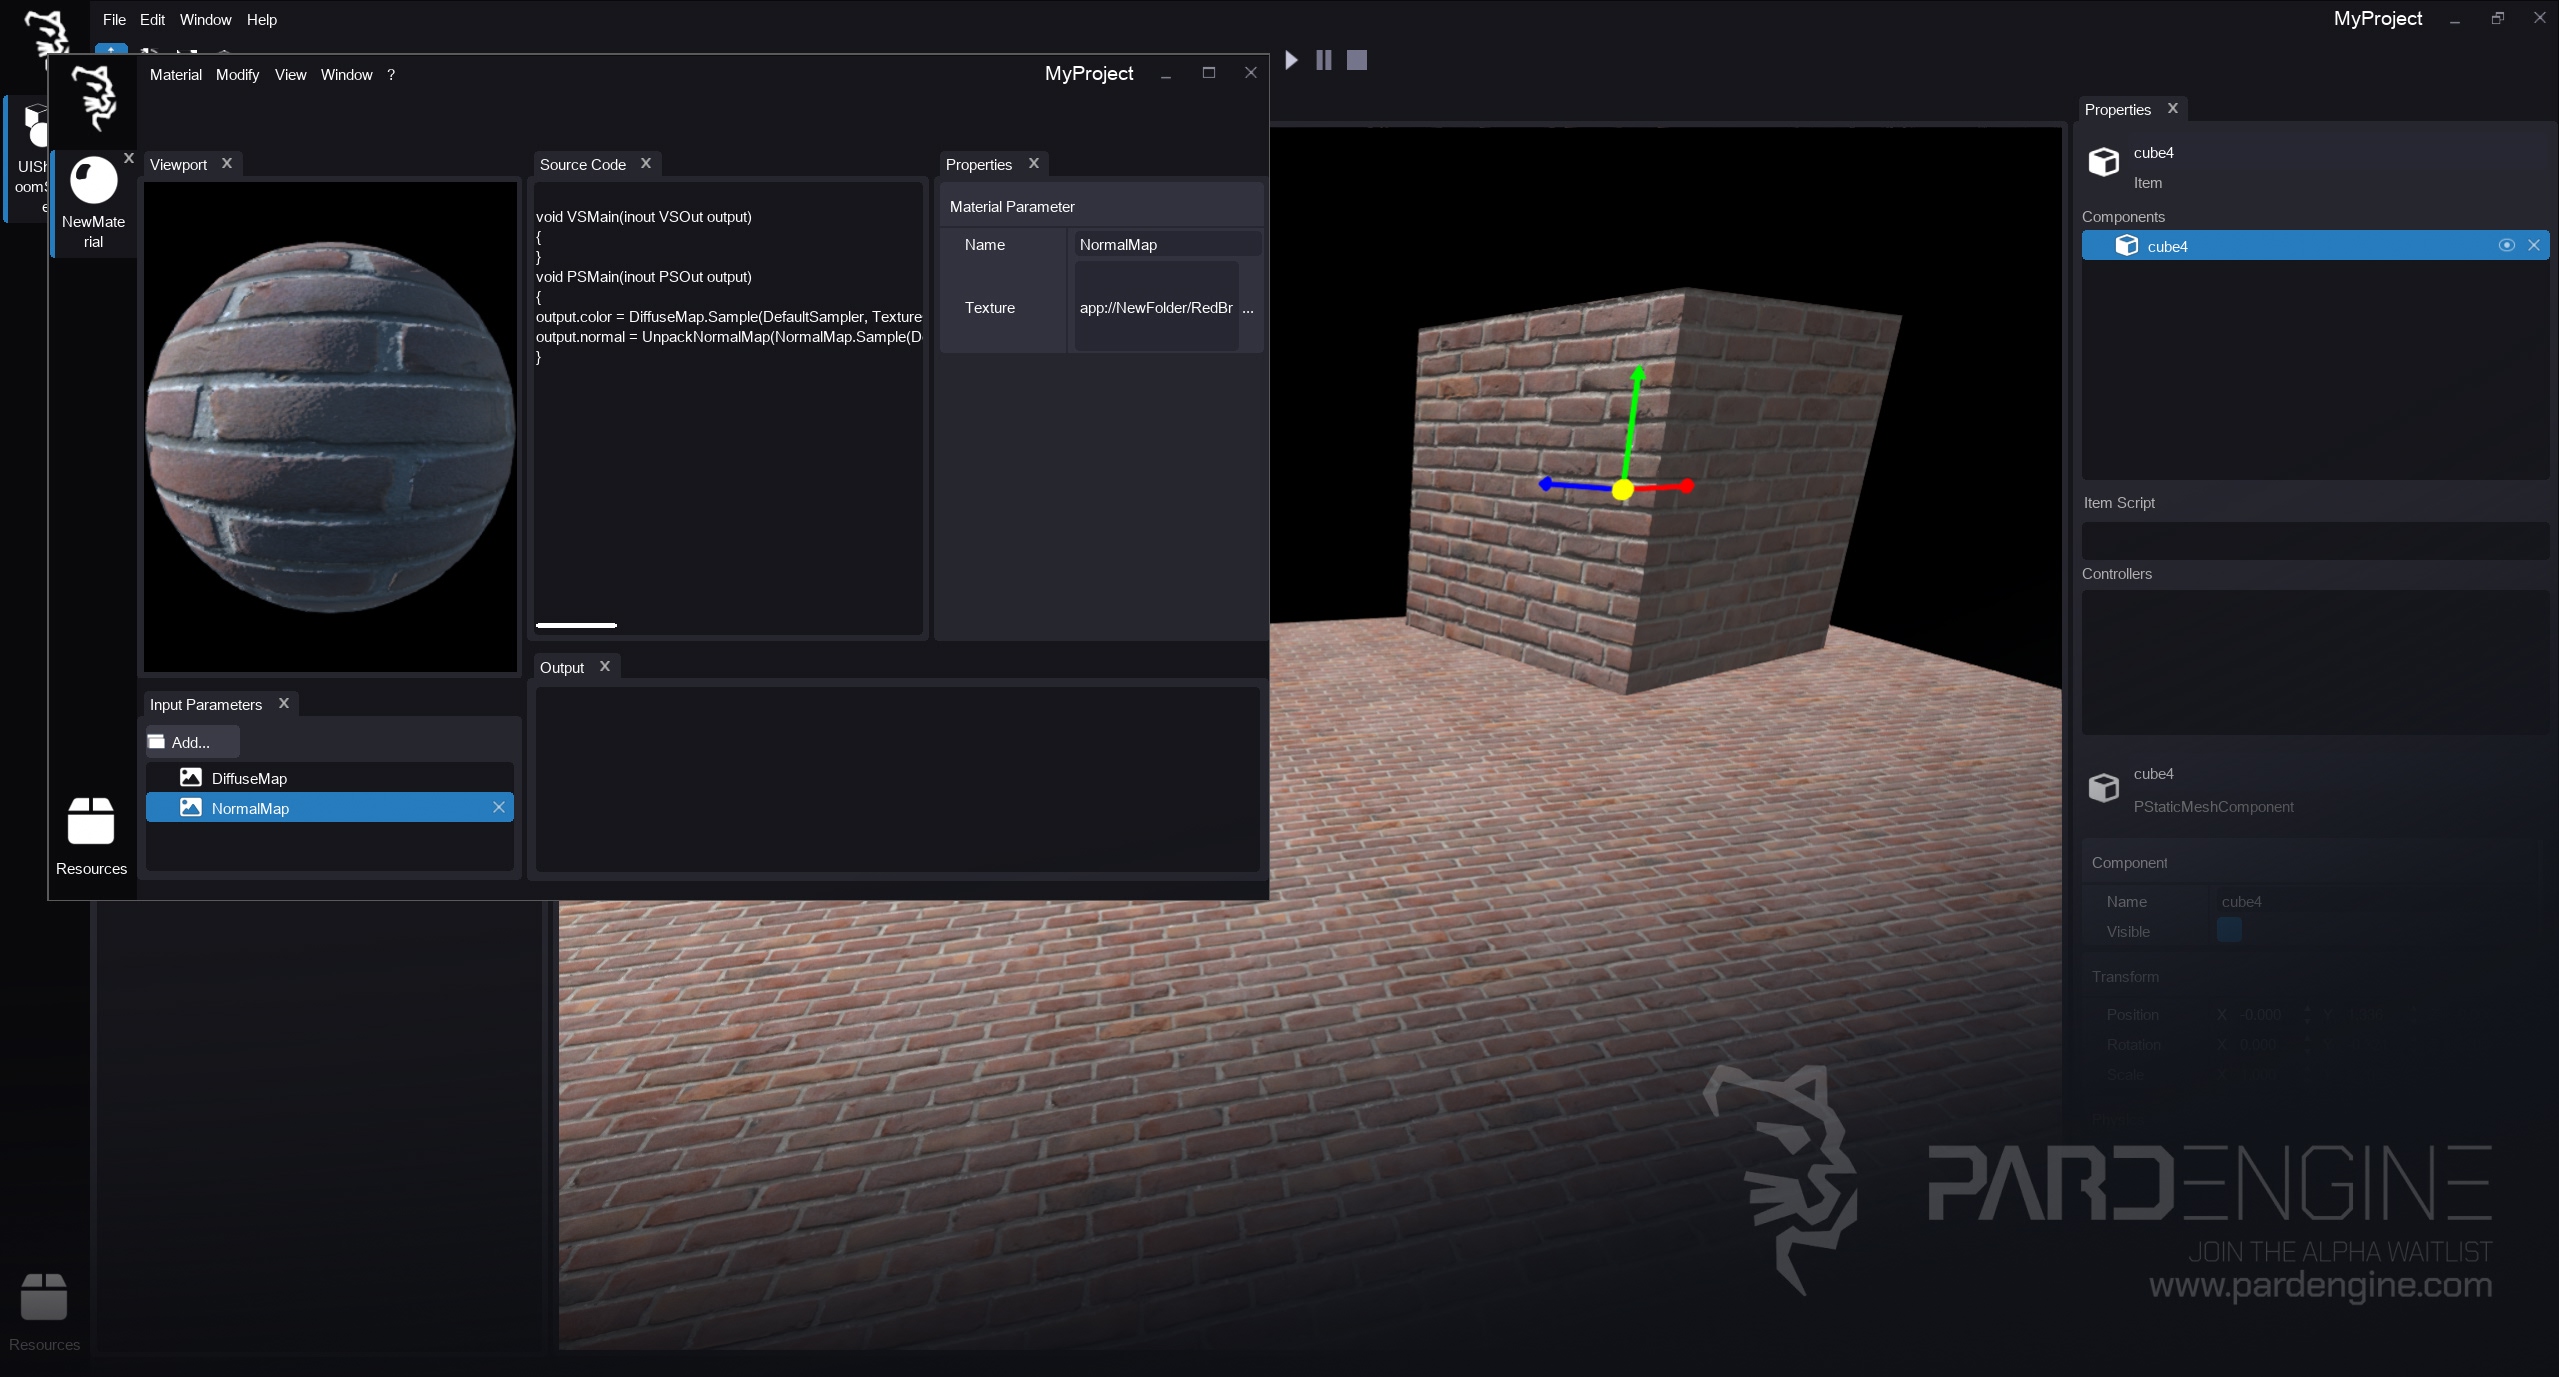
Figure 6: Applying a Normal Map. The normal map has been applied to the material, demonstrating the hot-reload feature that instantly propagates changes to all meshes using this material.
Ready to use the material? Select any mesh in the Scene Editor's Viewport, go to Properties Panel, expand the Materials list, and drag & drop your material in one of the slots, like we have already seen in the previous devlog. It applies instantly.
Pard Engine’s hot-reload system avoid us to restart or reopen the scene manually. Edit the material, hit compile, and watch the changes propagate live to every mesh of the scene using it.
For example, let's check this behaviour by applying a normal map: we need only to add one further input texture parameter, called NormalMap, and one further line of code:
output.normal = UnpackNormalMap(NormalMap.Sample(DefaultSampler, TextureCoordinate));UnpackNormalMap decompresses BC5-compressed normal data (stored in R/G channels) back into full 3D normal vectors. Read more about BC5 compression here.
That's all!
Now, if we recompile the material again, we'll see the changes propagate live to every mesh using it, both in the Material Editor's Viewport Panel and the Scene Editor's Viewport Panel, like in Figure 6.
Error Management
Shader development is iterative. If a syntax error occurs, Pard Engine catches it at compile time and logs it clearly in the Output Panel. We’ll see line numbers, and descriptive messages, making debugging fast and intuitive.
Pard Engine's Material Showroom: Advanced Materials
Let’s step inside the Material Showroom Scene to see more advanced materials in action:
PBR Workflow (Roughness & Metallic)
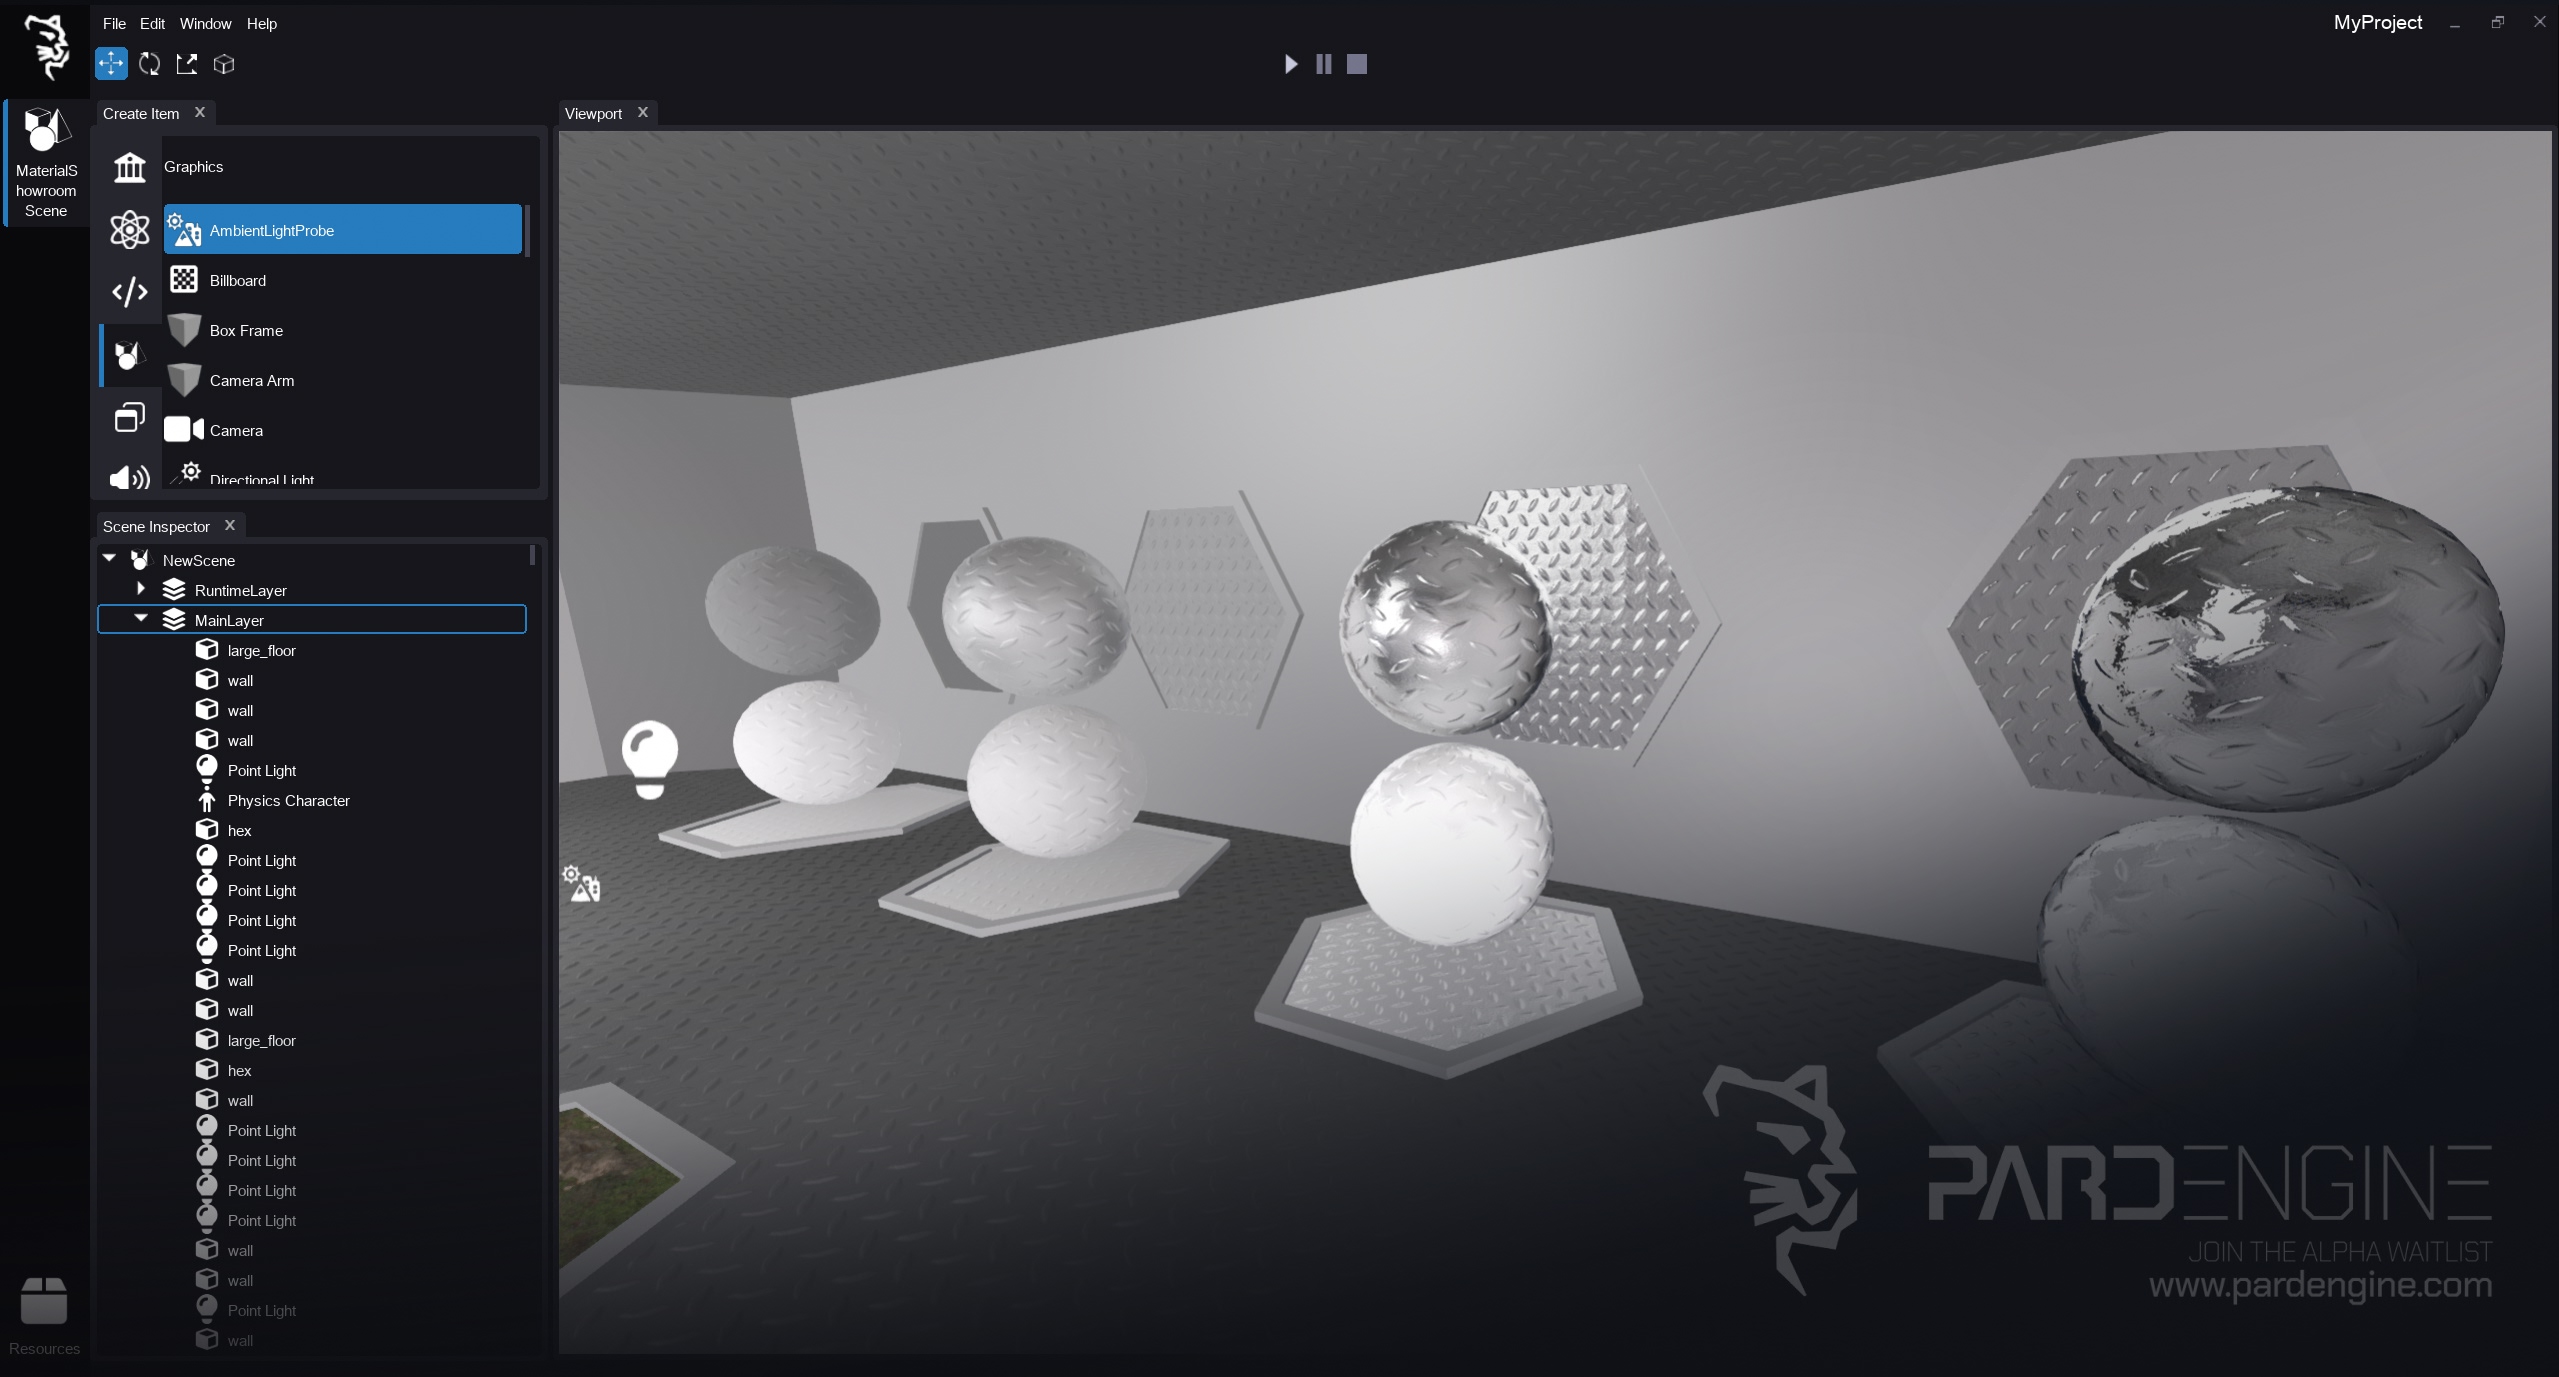
Figure 7: PBR Workflow (Roughness & Metallic)
The top row locks Metallic = 1.0 while sweeping Roughness from 0.0 to 1.0 (from right to left). The bottom row does the opposite (Metallic = 0.0). This demonstrates how physically-based rendering reacts to light and environment lighting.
Advanced shading effects
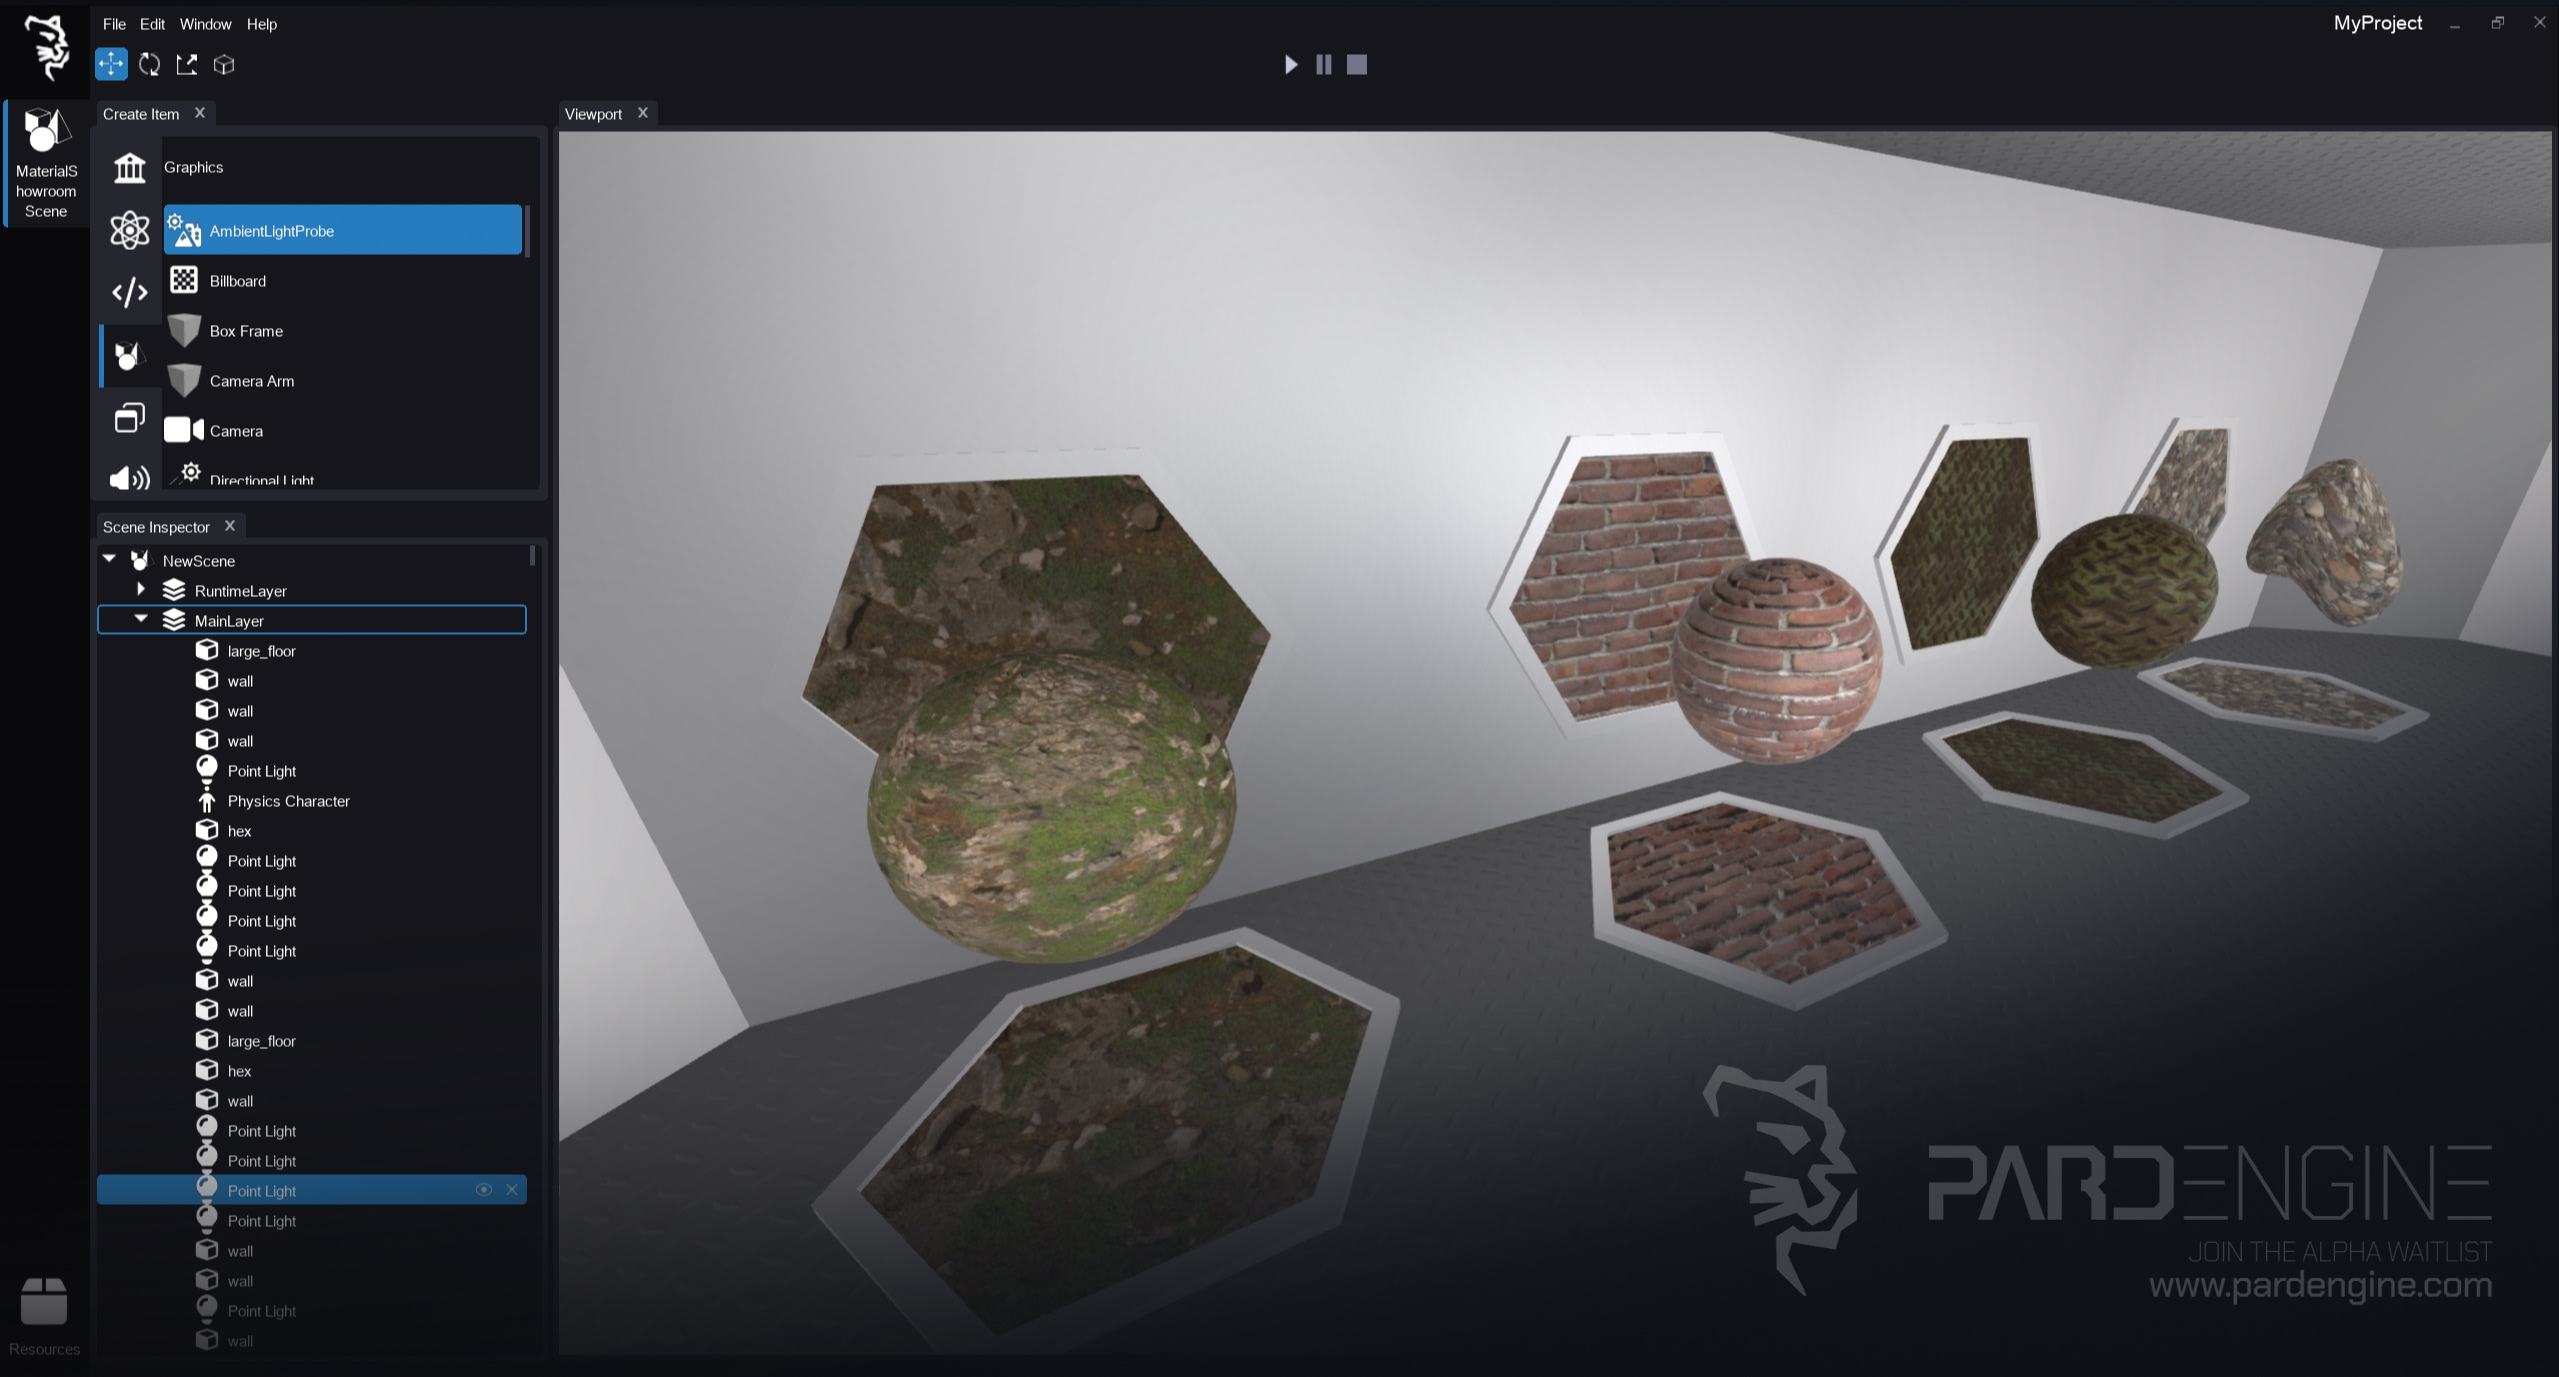
Figure 8: Advanced shading effects
Parallax Occlusion Mapping
The ground and brick materials (the first two materials on the left in Figure 8) use Parallax Occlusion Mapping to simulate deep surface relief. Despite being simple geometry, the shader displaces UV coordinates based on a heightmap, creating a convincing 3D illusion without additional mesh cost.
Animated Textures (Panning)
Using the built-in Time variable in the HLSL shader code, we offset UV coordinates over time:
uv += float2(panningSpeed * Time, 0.0);This creates fluid effects like flowing water, moving clouds, or scrolling grids.
Vertex Displacement
Unlike the previous effects, that use the pixel shader, this effect (the last material on the right in Figure 8) modifies vertex positions using a math formula in the vertex shader. The mesh deforms dynamically at runtime without requiring additional assets, perfect for waving flags, rippling water, or environmental animations.
What’s Next?
In the next devlog, we shift focus to C++ Scripting in Pard Engine. We’ll cover:
Entering Play Mode and running live scene simulations
Creating, binding, and unbinding C++ scripts to the Items of a Scene
Leveraging the Input System to build a First-Person Controller (mouse look, WASD movement)
Automatic mesh collider generation on import for instant physics interaction
Stay tuned!
Thank you for being part of the Pard Engine journey!
We’re getting closer to the release of the Alpha version, and your interest fuels every written line of code.
How you can help the project grow:
Support it on Patreon: Every contribution powers the development, no matter the amount.
Patreon LinkJoin the Discord Server: Chat with devs, share ideas, and get early updates.
Discord LinkReady to spread the word?
Share this article anywhere you like using the buttons in the share bar.
Stay tuned! The next devlog is coming!